In most digitizing software, density means the spacing between rows of satin or fill stitching, measured in millimeters. That makes it read backwards from how it sounds: a smaller spacing value puts the rows closer together and gives denser coverage, while a larger value opens them up and lightens it.
But not every source uses the word the same way. Some describe density more broadly as the amount of stitching relative to the size of the design. Both are in normal use, so a density number means nothing on its own — you need the software, the unit, the stitch type, the thread and the design it belongs to before it says anything at all.
Two things get called density
Worth separating before anything else, because the two conventions run in opposite directions and readers arrive holding one or the other.
| Sense | What is being measured | Which way it runs |
|---|---|---|
| Spacing — the software setting | The distance between rows of stitching, usually in millimeters | Smaller number, denser result. Inverse |
| Amount of stitching — the descriptive sense | How much stitching sits in a given area of the design | More stitching, denser result. Direct |
They describe the same physical property from two measurement conventions. The design world tends to use the second — a supplier calling a design “high density” means there is a lot of stitching in it. The software in front of a digitizer almost always uses the first. Neither is wrong; they just cannot be read off the same scale.
Why a smaller number can mean more stitches
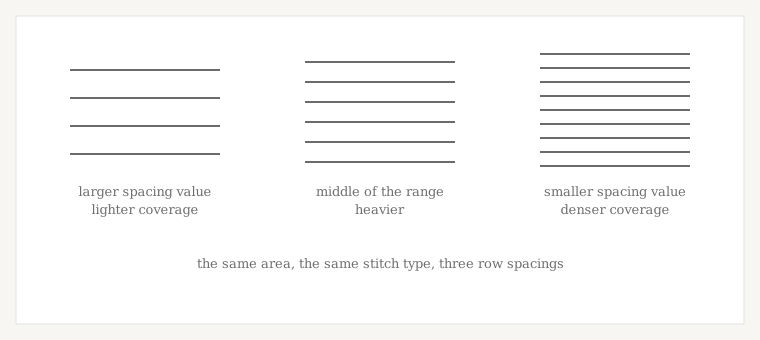
The vendors are unambiguous about the direction. Wilcom’s EmbroideryStudio documentation instructs you to enter a smaller value to increase density and a larger one to reduce it. Embird’s Studio NEXT documentation says the same thing the other way round: increased spacing gives lower stitch density. And Hatch, whose default stitch spacing is 0.36 mm, calls for roughly 0.16 mm when stitching over 3D puff foam — a smaller number for the heaviest job on the machine, because the needle penetrations have to be close enough to cut the foam.
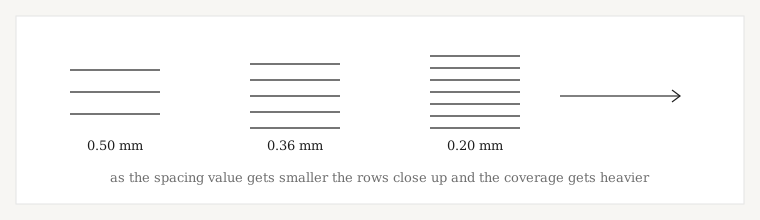
Those figures are software defaults and worked examples, not recommendations. 0.36 mm is what Hatch opens with, not the correct density for your logo.
Satin, fill and run are not the same question
Row spacing only means something where there are rows.
- Fill and tatami are the plain case: parallel rows with a measurable distance between them.
- Satin is spacing between the individual stitches of a column, and software often varies it automatically as the column widens or narrows — so a satin object can have a different effective spacing along its length. Some packages express this as a percentage of a preset rather than a millimeter value.
- Run stitches have no rows to space. What you set on a run is stitch length, in millimeters — shorter around a tight curve so the line stays on the path, longer where you want the look of hand stitching. “Reduce the density of that outline” is a common instruction and not one the software can act on.
When density may be too high
Over-dense files announce themselves, though rarely with proof. What you may see:
- a stiff, board-like patch that will not move with the garment
- thread build-up where objects stack, and poor registration through it
- thread breaks, often repeatedly in the same place
- needle stress and needle breaks
- puckering and rippling around the design
- a design that runs slowly or makes the machine labor
None of these proves the density is wrong. Thread breaks come from needle condition, thread path, tension, sequencing and minimum stitch length as readily as from packed stitching. Puckering comes from stabilizer, hooping and fabric behavior. Excess density is a plausible contributor to all of them and the sole cause of very few — which is what the table further down is for. Over a large area the same excess compounds, which is why a jacket back or other large-format design is planned around total coverage rather than a single density value.
When density may be too low
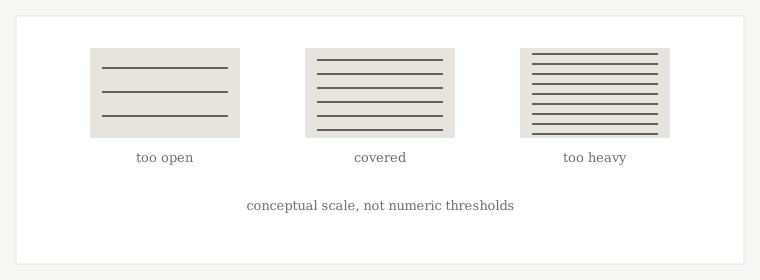
- the garment reading through between the rows
- thin, patchy coverage, or a color that looks washed out
- gaps at the edge of a shape, or where two objects meet
- an outline that does not quite cover the fill edge it sits on
The important one is the gap between two shapes, because it is the most commonly misread symptom on this whole subject. Gaps like that usually come from too little pull compensation rather than too little density: the shapes are sewing narrower than they were drawn, so they no longer meet. Closing that gap by adding stitches gives you a stiffer garment with the same gap in it.
What changes the right density
There is no single answer because too much feeds into it:
- Thread weight. Thicker thread occupies more physical space, so the same nominal spacing does not produce the same coverage across thread weights. Madeira states the principle plainly — density has to be adjusted for the thread being run — and at least one package derives its default spacing from the thread weight you have set.
- Fabric. A stable woven takes stitching that a knit which moves will not. Piqué has a texture that affects how the edge of a shape reads. Fleece and terry have loft, so the question becomes how the stitching sits on the surface rather than how tightly it is packed. Denim and twill are stable, which is not the same as an invitation to add density.
- Size. The same spacing behaves differently in a 2-inch mark and a 12-inch back.
- Layering. Two objects that are each reasonable can be far too heavy where they overlap. Density is not only a per-object number; what sits under what, and in which order, decides how much thread ends up in one place.
- Underlay, direction and the coverage you actually want. Open coverage is sometimes the design.
Which is why this page carries no fabric-by-fabric millimeter chart. The charts you will find are not published by the software vendors or the thread manufacturers, they do not agree with each other, and none of them says which software’s scale their numbers are on.
Density is not stitch count
These get used interchangeably and they are different measurements. Stitch count is a total — how many stitches the file contains. Density is a rate — how closely they sit.
A jacket back can carry a very high stitch count at entirely ordinary spacing: it is simply a big design. A small emblem can be badly over-packed at a fraction of that count. So a high stitch count is not evidence of a dense file, and “reduce the stitch count” and “reduce the density” are different instructions — the first is usually about run time and price, the second about how the finished piece will behave.
What resizing does to it
Changing the size of a design can change its effective spacing, its stitch lengths, its coverage and its stitch count — and which of those move depends on what you are resizing and how.
Where the software still has the underlying objects, it can regenerate the stitching at the new size and hold the spacing you asked for. Where all that exists is the finished stitch data, there is nothing to regenerate from: the points move further apart or closer together with the design, so enlarging thins the coverage and reducing packs it tighter. Some packages offer a resize that recalculates density for exactly this reason. It is worth knowing which of the two you are doing before you scale anything much.
Why a stitch file resists resizing in the first place. Vector vs embroidery digitizing →
Density, underlay and compensation
Three settings that get used to fix each other’s problems.
Underlay is the other half of coverage. It stabilizes the ground, lifts the top stitching and gives it something to sit on, so a design with proper underlay reaches good coverage at a lighter top density than one without. Reaching for density first, when the real answer is underlay, is how a patch turns into armor.
Pull compensation is not a coverage control at all. Density sets spacing; compensation corrects the dimensional distortion that happens as thread pulls fabric while it sews. Adding density does not correct a shape that finishes narrow, and adding compensation does not open up stitching that is packed too tightly.
The material behind the garment carries part of the same load.
Stabilizer & backing →
Which underlay a fabric wants, and what it does. Underlay reference →
Why shapes finish a different size than they were drawn. Pull & push compensation →
Diagnosing a possible density problem
Read the middle column as a suspicion and the right-hand column as the work. Almost nothing on this list is diagnosable from the symptom alone.
| What you are seeing | Possible density relationship | Check these too |
|---|---|---|
| Fabric showing through the stitching | Spacing possibly too wide | Underlay, thread weight, fabric texture and loft, stitch direction |
| Gap where two shapes meet | Rarely density | Pull compensation first, then object construction |
| Stiff, heavy, board-like result | Spacing possibly too tight | Layered or duplicated objects, underlay weight, sequencing |
| Thread breaks in the same place | Excess density may contribute | Needle, thread tension, thread path, minimum stitch length, sequencing |
| Puckering | Excess density may contribute | Stabilizer, hooping, fabric stretch, tension |
| Poor registration through the design | Density adds stress | Compensation, hooping, fabric movement, sequencing |
| Small text closing up | Too dense for that size | Letter height, column width, stitch type |
Puckering has its own diagnosis, and density is one branch of it. Why embroidery puckers →
So does thread breaking, where the machine is as likely a suspect as the file. Why embroidery thread breaks →
How different software describes it
Before changing a number, find out what your software means by it. The setting has different names, different units and, in one case, different figures in different parts of the same vendor’s documentation.
| Source | What the setting represents | Unit | Direction |
|---|---|---|---|
| Wilcom EmbroideryStudio | Spacing between rows; satin can also be a percentage of a preset | mm, or % | Smaller value, denser |
| Hatch | Stitch spacing; documented default 0.36 mm | mm | Smaller value, denser |
| Embird Studio | Distance between rows, on a software-specific scale. Its own documentation is not consistent about what that scale equals in millimeters — check the manual for the version you run | Software-specific | Larger value, lighter |
| Embird Studio NEXT | The same setting, renamed to Spacing | mm | Larger value, lighter |
| Descriptive use (design suppliers, educators) | How much stitching sits in the design relative to its size | Conceptual | More stitching, denser |
That Embird row is worth dwelling on for a moment, because it is the best argument on this page for reading your own manual. One part of its documentation indicates a density of 4.0 corresponds to 0.2 mm between rows; another indicates a value of 4 means 0.4 mm. One possible explanation is that some fill systems measure between every second line rather than between adjacent stitch rows — but because the documentation does not explicitly reconcile the two values, this guide does not treat them as interchangeable. Two figures from one vendor, a factor of two apart, is reason enough never to carry a number from one package into another.
Where figures appear on this page they come from vendor documentation — Wilcom, Hatch and Embird — and from manufacturer material such as Madeira on thread weight. They are defaults and worked examples from those systems, not settings we are recommending for your job.
The short version
- Density usually means row spacing, in millimeters
- Smaller spacing value, closer rows, heavier coverage
- It applies to satin and fill; run stitches have a length instead
- A number is meaningless without its software, unit and stitch type
- Stitch count is a total; density is a rate. Not the same thing
- Coverage comes from underlay as well as top stitching
- Gaps between shapes are usually compensation, not density
- Every symptom on this page has other causes worth checking first
How the whole file gets built, of which density is one decision. What embroidery digitizing is →
Ready when you are