A flat sew-out can look perfectly registered and still walk off center once it is on a structured cap. The crown is curved, the front panels meet at a seam, and the machine is sewing on a driver that moves the hat instead of a hoop that holds a flat shirt. A file built left to right, the way a chest logo is often built, pushes that seam as it sews. Center-out sequencing is how the design stays where you placed it.
The flat test is not the cap
Sewing the same file in a flat hoop tells you whether the stitches cover and whether the colors stop in the right order. It does not tell you how the front panels will move. On a cap the fabric is already shaped, the seam is a hinge, and every stitch that pulls toward one side takes the design with it. By the time the right side of a wordmark sews, the left side has already tugged the crown.
That is why a left-chest file dropped onto a hat looks off after the first dozen stitches, even when the artwork was centered in the software. The path was written for a flatter hoop and a different kind of pull.
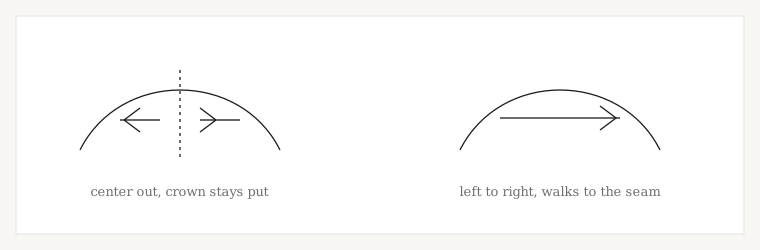
What center-out actually changes
The punch starts at the center of the mark, or on the center seam, and works outward to both sides. Travel between objects stays near that seam instead of crossing the open panel. Two-color wordmarks still sew this way: each color starts near the middle of its own shapes, not at the left edge of the first letter.
Stitch count on the front panels comes down at the same time. A cap front cannot carry a jacket-back fill. Fewer stitches mean less pull on the seam and less chance the design creeps as the driver turns the crown. Height is limited too. Size and placement for that front panel are in the cap embroidery size guide.
| What you see | What is usually involved | What to check first |
|---|---|---|
| Design sits left or right of center on the hat | Sewn left to right on a curved crown | Whether the file starts at the center |
| Flat sample looks true, the cap does not | The test never used the driver | Sew one on the actual cap frame |
| Letters lean toward the seam | Too many stitches on the front panels | Stitch count, then compensation |
| One side of a two-color word looks lower | The second color was not started from the center | Color order and start point |
| The mark looks fine until the last object | A long tie-off or a jump across the panel | Travel path near the end of the design |
The driver changes the compensation
Pull compensation on a shirt widens a column because the knit closes up. On a cap the fabric is moving on a curve, and the same number can be too much or too little depending on the crown and the foam. Copying the shirt compensation onto the hat is a common way to make a centered design look skewed.
Cap and hat digitizing starts in the middle of the mark for this reason. If the brand also wants foam, that is a separate construction: 3D puff needs its own column widths, not a toggle on the flat cap file. How those columns lift is its own note, puff columns that lift, then stop.
Flat hoop and cap driver are different tests
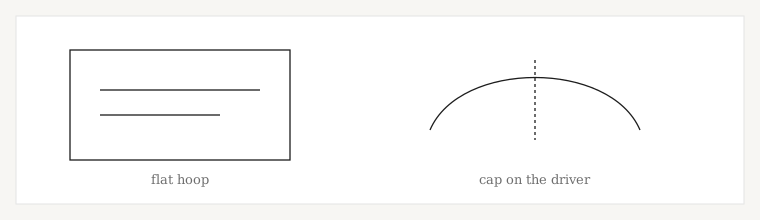
A flat hoop holds the fabric still. The needle moves across a plane, and a centered design stays centered because nothing in the fabric is walking. A cap driver holds the crown and rolls it. The seam is already a fold. Stitches that pull to one side take that fold with them, so a file that was true in the hoop is off on the hat.
Sew the sample on the cap frame if the job is a cap. A shirt sew-out of a cap file only proves the stitches cover. It does not prove registration.
Where to look when a cap has already sewn badly
Start with the file, then the frame. A lot of “bad digitizing” on caps is a shirt path on a driver, and a lot of real digitizing faults are still just the start point and the stitch count.
| On the finished cap | Likely file cause | Check before you repunch |
|---|---|---|
| Whole mark shifted to one side | Sewn from the left edge | Start point and object order |
| Fine until the second color | Second color started at the end of the first | Each color begins near center |
| Gaps along the center seam | Travel crossed the seam late | Connectors kept on the seam |
| Front panel buckled | Stitch count too high for the crown | Fills and puff, not just the path |
| Looks centered, letters lean | Shirt compensation on a curve | Compensation for this crown |
Two colors still start in the middle
A two-color word is the case people exempt. They sew all of the first color left to right, then all of the second color left to right, and call it center-out because the art was centered on screen. It is not. Each color has to begin near the middle of its own shapes. Otherwise the second color lands on a crown the first color has already pulled.
Height still rules. If the art is too tall for the front panel, sequencing will not save it. Measure the panel first, using the cap size and placement guide, then sequence what actually fits.
Ready when you are